Wednesday, May 19, 2010

The Perfect Panini


Have you ever had a Panini? This Italian sandwich is similar to a grilled cheese sandwich. Typically the sandwich is pressed on a grill to melt the cheese and toast the bread. I'll show you how I make a Panini.


First off, I don't own a Panini press. Don't get me wrong, I would love to have one. I do what I can with what I have on hand. Cast iron pans are my press. I have 4 cast iron skillets including a grill pan. Cast iron is inexpensive, wears forever, heats evenly, is made in the USA and will give your wrist a workout. Start off by pre- heating your skillet or grill pan on medium heat.


Next use a uncut loaf of bread. Use any kind you like. Italian, Sourdough, Foccacia and Ciabatta. Make sure you pick a dense bread. I wouldn't use a white bread. I love the look of a rustic sandwich. Cutting your bread thick is the trick.


Roasted peppers taste wonderful melted in between the layers of meat and cheese. You can roast them yourself on the grill. For this application you can cheat like I did and purchase them already roasted and peeled in the can.


I've tried making the Panini's all different ways. I played with all of the different ways to toast the bread. Using butter, olive oil and just plain naked. All work well. Of course butter spread on the outside of the sandwich tastes the best. If you are watching your fat and calories naked is almost just as good. Layer your bread, meat, peppers, and cheese.


This sandwich is made with roasted turkey,cranberry mustard, peppers and provolone cheese.


Now for the fun part! Add a skillet to press down the Panini. I normally use 2 skillets to press the sandwich. Press for about 4-5 minutes each side.


A perfect Panini. Someone even told me that my Panini was better than Panera Bread's Panini. What a compliment. I encourage you to dig out your iron skillets, throw caution to the wind and create a sandwich all your own.

Wednesday, May 5, 2010

Magic Ball


Do you know what a magic ball is? It's a beautiful ball of yarn with special little surprises hidden inside. The theory is that as you unwind your ball of yarn while knitting one will come across fun treasures inside. It's like opening a present.


The sky is the limit when it comes to fiber choice. You can use any yarn you happen to have. I received the pink ball from a swap. My partner used bulky weight alpaca.


Think about the recipient and choose items they will enjoy. Things like buttons, charms, lip gloss, row counters and stitch markers always are welcome. Even some yummy chocolate hidden inside is nice. I am making one for a young girl who loves to crotchet.


I started with a cute pair of socks in the center. I'm using a yellow cotton yarn that's perfect for crocheting dishcloths. Wind the yarn around the item you have stashed inside.


Keep adding little treasures as you wind the yarn into a ball. Other idea's for surprises are any type of candy, jewelry, or a sweet little note.


Tie a pretty ribbon onto the ball or decorate with feathers, bows or floral birds. Adding a crochet hook or a set of knitting needles is a nice finishing touch. Each magic ball is unique and different depending on the recipient. Have fun! Create something lovely for someone you love!

Thursday, April 29, 2010

It's Been Such A Long Time........


It's been such a long time since I have blogged. I can't believe how fast the time has flown by. I've noticed several things since I've been away from blog world. First and foremost, blogging challenged me to finish what I start. I miss that. Reading blogs inspired me to broaden my skills. I miss that too. So here I go with a new commitment to myself to get back on the blogging train.


I have been creating lots of different things over the past 7 months. One thing I have been occupied with is hand painting yarns. I have graduated from Kool Aid dyeing to professional dyes. What a colorful world I have been exploring. The picture above is a sample of playing with different colors of dyes. I'll tell you this, the finished yarn is not what I planned. I sure like it though.


I knitted up a swatch to see how the colors would meld together. The yarn base is a Merino 100% wool bulky weight. The feel is soft and smooth. I knew whatever pattern I chose for this yarn would have to mix up the variegation of color in the yarn.


I came across the Chickadee cowl pattern with the help of the search tools in Ravelry. The stitch pattern is pretty simple. The pattern is a linen stitch. It's perfect for variegated yarns. I love the results!


Another experiment in dyeing. I don't know how I did this one, but I adore it!
I have a lot more to share with you all in the future. Please stop back again!

Wednesday, September 9, 2009

Rocky Mountain High


I have dreamed of becoming a forest ranger. That is, I did as a child. My family took camping trips out west to mountain country. I would watch the scenery pass me by from the front window of our truck camper. Being here brings back a flood of memories. Here it is over 30 years later. Today I sit in the front seat of a convertible next to my darling. We spent the day in Rocky Mountain National Park. It's an unbelievable sight! Words can't describe the awesomeness of this park.

The road that loops around the park goes up over 12000 feet.

The drive to the top tested my nerves. There came a point that I couldn't look over the edge of the road. There is no guard rail. I will admit that I was terrified!

We were lucky to see Elk graze on the rocky tundra at the highest elevation.

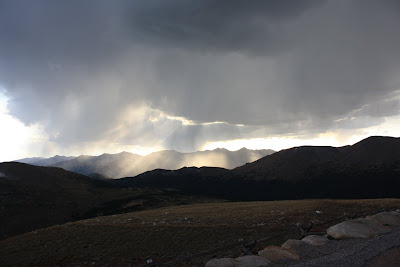
At the highest point it was cold and rainy. Then the sun shone down like a gift from God! What an experience!

Monday, September 7, 2009

Chasing the Sun


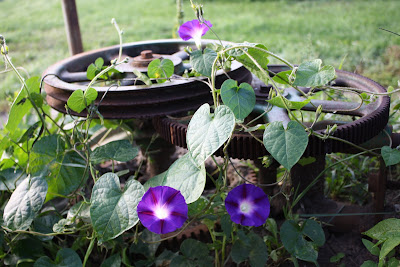
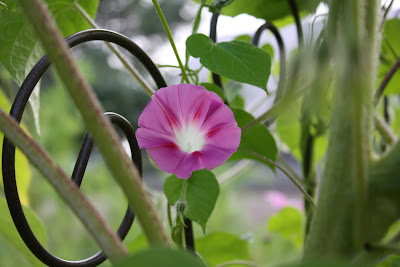
I was lucky to capture these beauties on film Saturday morning. Morning glories are on of my all time favorite annual flowers. They look so pretty climbing up an old gear box.

I planted several different varieties. I don't remember the name of this purple flower. The colors are so vivid.

The vines are now climbing on my sunflowers! It's lovely to see. My Grandmother took pictures of her flowers. She loved to garden and wanted to share and remember her success. Grandma would pull out her photo's for all of us to see. When I was younger I never understood the draw of flower pictures. I always politely sped through the dreaded flowers! Look at me now. I never would've thought that I would be taking pictures of flowers. I bet my Grandma would be proud.

We have been chasing the sun all day today. We left for vacation and are heading west. It's amazing to see these awesome wind turbines along the interstate. This is a shot of a cool turbine near Paw Paw Illinois. I'm sure the windmills are all over the country. There is something so majestic about these huge power makers. We found ourselves mesmerized by them. I am planning on blogging from the road. That's if I can get Internet. I hope you stop by and join me on our adventure!

Friday, September 4, 2009

Marching On Baby


My very first sock is taking shape. I can't believe that I waited so long to jump into sock knitting. So far I am finding the process fairly simple. The pattern is from the book Getting Started Knitting Socks by Ann Budd. The leg of the sock is a simple knit 3, purl 1 rib. I have knitted away with no problems. Or so I thought!


The issue is me! I was so excited to get to the point where I could try on the sock. I had been anticipating that moment for several days. Finally I tried on the sock......It's a little big. It's not huge. It doesn't fit snug. I looked back at the pattern. Hmm, what did I do wrong? I read the first paragraph where it talks about size. I just skimmed through that part you see. I knitted the wrong size! When I saw the number 8 and I assumed it meant shoe size.


My thought about the second sock is to knit the correct size. I can't imagine frogging this entire project. It's just a little big, right? What would you do? I have learned yet another great lesson. Read your pattern carefully from start to finish! lol! It makes for a funny story. I will surely always remember my very first adventure into sock knitting.

Have a great weekend!

Thursday, August 27, 2009

Back in the Saddle


I know it's been such a long time since my last post. I want to thank Grace, Susan and Marsha for the sweet e-mails. You all inspired me to sit back down at the computer and pound out a post. Thanks girls! I can't believe how fast the time has flown. It's been an event filled summer. Lots of work and not enough play! lol! Our summer here in northern Illinois has been a cold one. It's the coolest summer I can remember. The weather is not helping my garden. I am praying for heat so my tomatoes can ripen. I was able to get several jars of pickles made. Looking at the calendar I was shocked to see that fall is less than 30 days away. The first day of Autumn begins on September 22. Speaking of fall, I have finally started knitting my very first socks. I hand dyed the fiber myself. I call it cornfield colorway.

One of the creative things I have been playing with is dyeing yarn. I have been experimenting with different methods cooking batches of wool yarn. I am using simple supplies like good ole Kool Aid. You know, the stuff you drank as a kid.

First you need to make sure your fiber is 100 percent wool. For this method I used the crock pot. I filled the container half full of water and set the heat on high. Let the water get steamy. Using yarn that has been skeined soak it in water with a touch of soap for at least 20 minutes. Squeeze out the excess water. You are ready to add the yarn to the crock pot. Because I was experimenting I decided to pour the dry Kool Aid right on top of the yarn.

I used lemon lime and orange Kool Aid. The smell from the kitchen was perfumed with fruity scents! I gave the yarn a slight stir to dissolve the powder. I wanted the colors to meld together and still look orange and green. I'm not sure how long it took for the colors to bond to the fiber. Probably not more that 30 minutes. You know it's finished when the dye is gone. The water will look clear.

Take the yarn out of the crock pot. Watch out, it's going to be hot. Let it cool off. I rinsed it in the sink. Hang it out to dry and then re-skein the yarn. Here is the finished product.

What do you think? Pretty cool. I have tried all different methods that I will share with you in the future. I have to say that the entire process is so enjoyable. If you have any questions please ask. I'm not an expert but I can muddle my way around and tell you what not to do! lol!